We recently received a solicitation to review a government document regarding radon in multi-family buildings. It is great to see...
Blog Articles
A radon professional coming to the CERTI site might ask themselves what good is a course based on a DIY...
We often receive emails or phone calls from CERTI students who are challenged by clients when they are asked to...
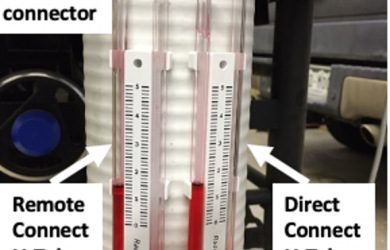
Everyone in the radon biz has seen countless pictures and illustrations of U-tubes mounted on the side of the vent...
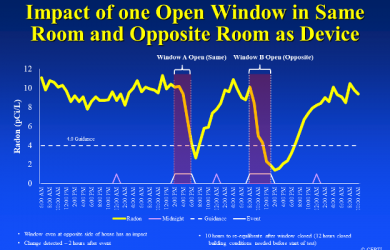
At CERTI, we are frequently called on for advice by students. More and more, we have been receiving calls from...
So you’re thinking about hitting the road and giving radon presentations? Perhaps presenting to real estate offices, builders, county commissioners,...
Douglas L. Kladder, Director CERTI Active Soil Depressurization has proven to be a very reliable means by which radon laden...
The reference document is loaded with 133 pages of content supported by 81 diagrams and pictures as well as 21...
The investment one may make when starting a radon mitigation business will certainly depend upon what tools and equipment you...
There are four primary things a student can to do to improve their chances of passing either the radon measurement...
Tip #1: Complete a radon measurement course before committing.Radon measurement device manufacturers are a reputable group. However, they have a...
